Private Email Setup For iOS
iOS Email Setup
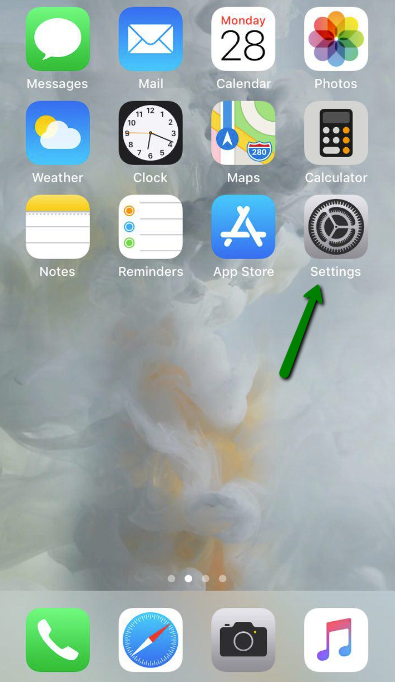
Step 1: Go to Settings from your iPhone's home screen:
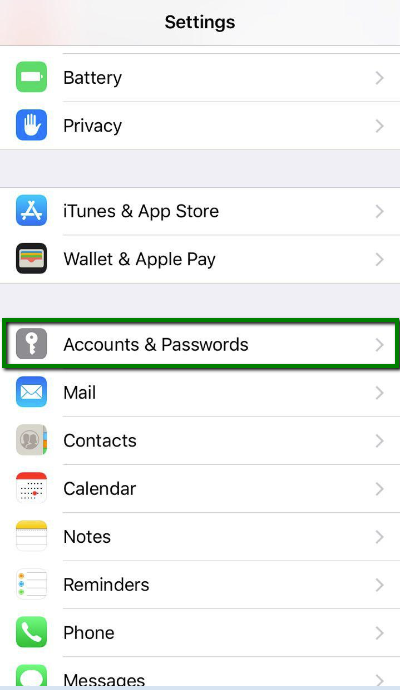
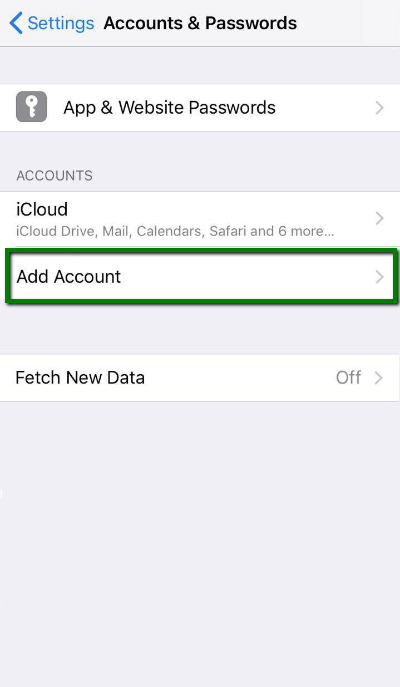
Step 2: Choose Accounts & Passwords and click Add Account:
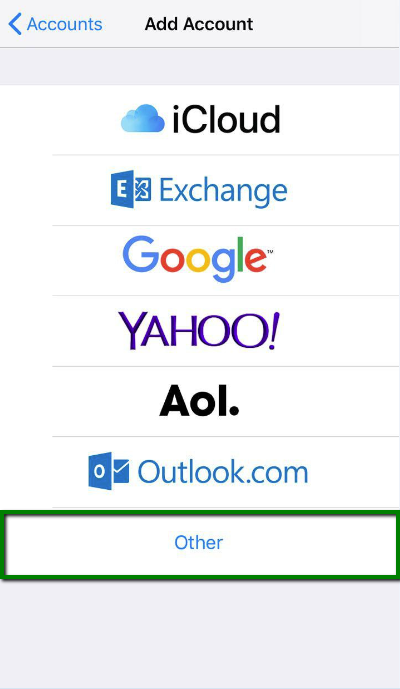
Step 3: Choose Other from the list that appears:
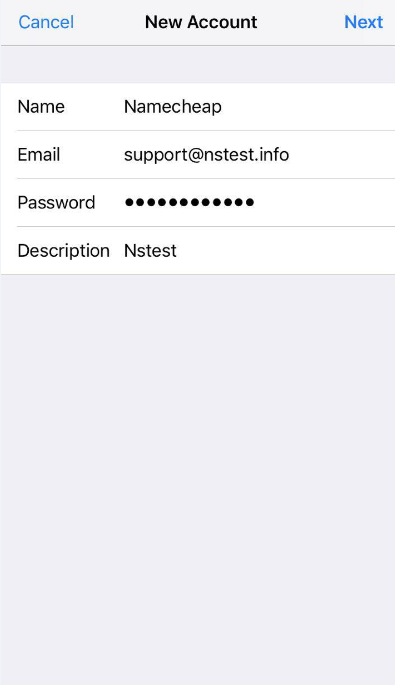
Step 4: Select Add Mail Account and enter the following records:
- Name - Your name (will appear as sender's name and will be seen by your recipient)
- Email - Your full Private Email address
- Password - the password for this email address
- Description - lets you specify any description (we suggest you use your email address)
Click Next.
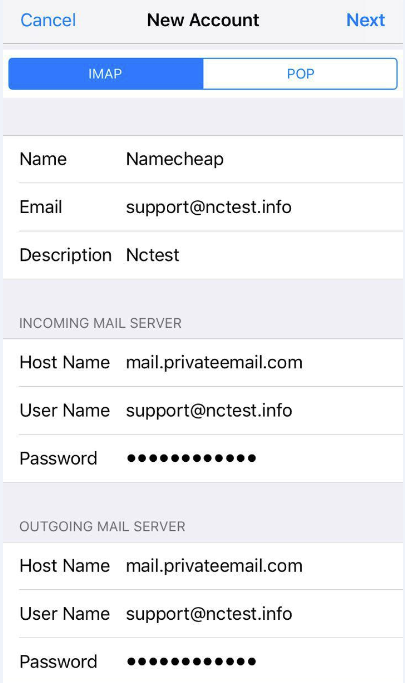
Step 5. Select protocol type: IMAP or POP3. We advise you to use IMAP. Your selection will be highlighted blue.
What is the difference between IMAP & POP? IMAP and POP are two ways to receive and store your emails. IMAP keeps your emails on the server so you can see them from any device, while POP downloads them to one device, and they usually get deleted from the server.
Step 6. Settings are the same for both IMAP and POP3:
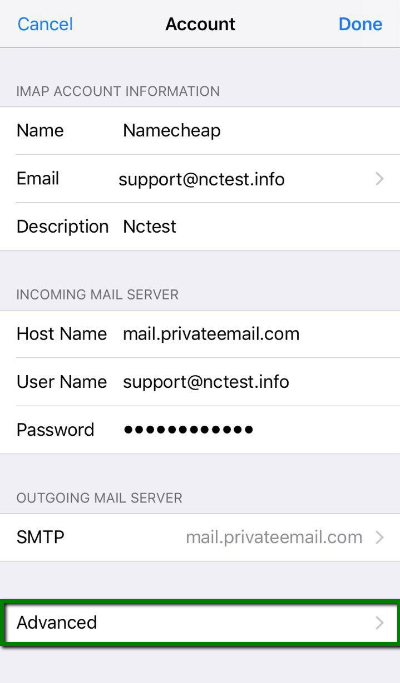
- Name, Email and Description: should have been already filled in
- Host name: mail.privateemail.com (same for all accounts)
- User Name: your Private Email address
- Password: password for your Private email
Click Next.
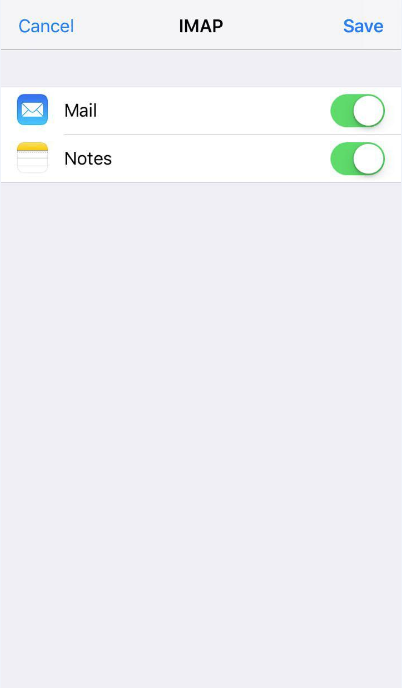
Step 7. If you use IMAP, you can enable the following services:
Click Save and wait while the system completes necessary checks.
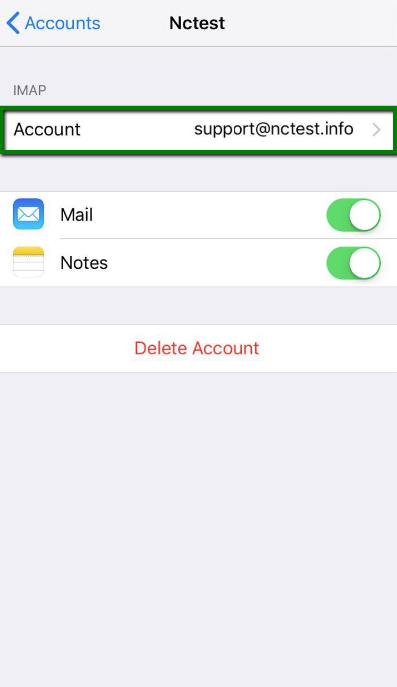
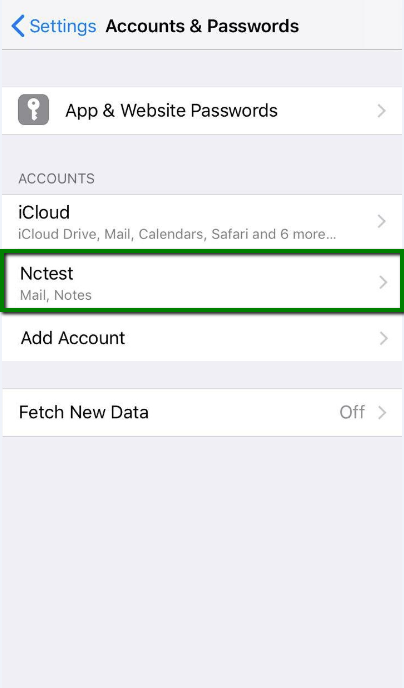
Step 8. When the checks are done, you'll be redirected to the Accounts & Passwords screen. Choose your newly created account there:
Step 9. Scroll down and select Advanced:
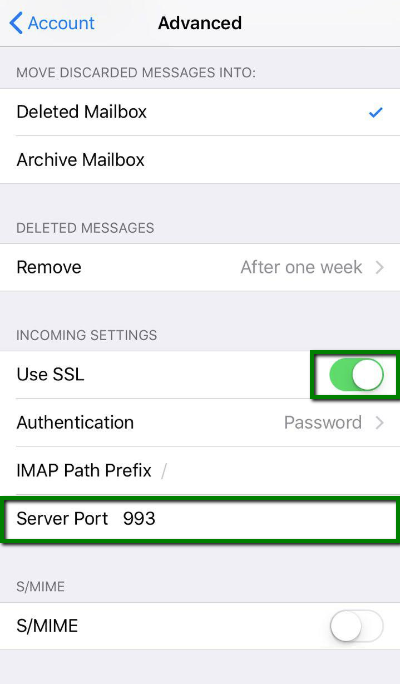
Step 10. Here you can select additional settings for IMAP or POP3. If you set IMAP connection, use port 993 (with SSL) or port 143 (without SSL).
or
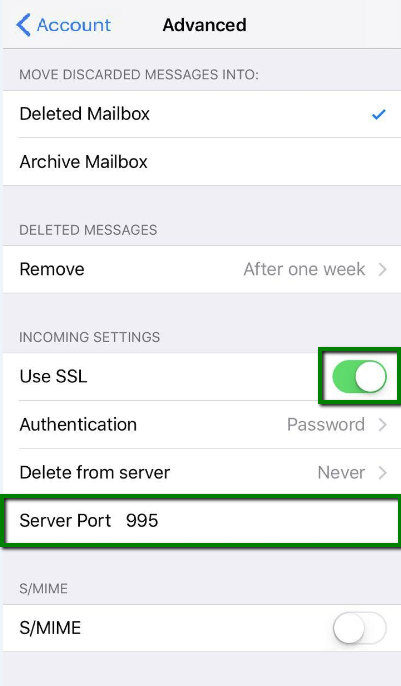
If you chose POP3, you need to use port 995 (with SSL):
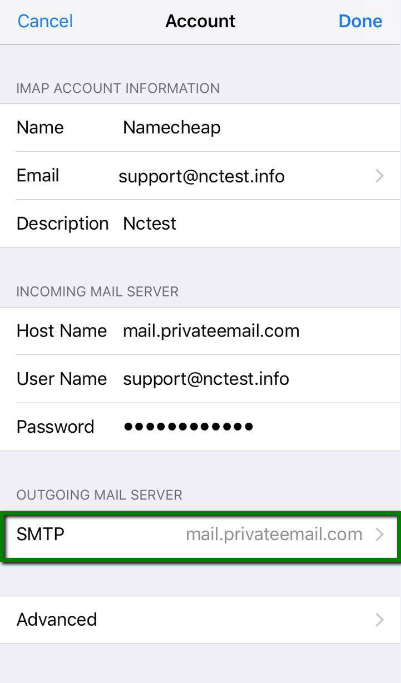
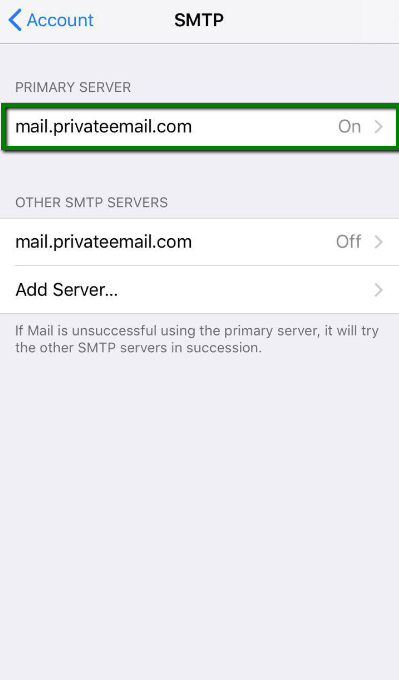
Step 11. In order to set up additional settings for outgoing server, return to the previous menu and then go to Outgoing Mail Server by pressing on the hostname of the server. From the list of servers, select Primary Server:
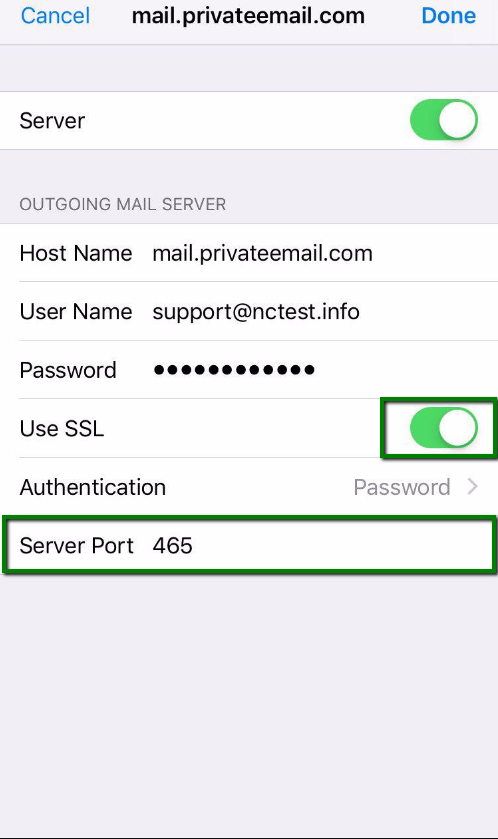
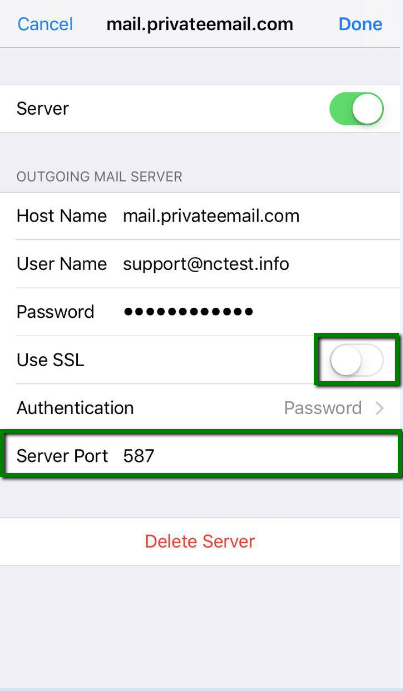
Step 12. For Outgoing Server (SMTP), select port 465 (with SSL) or port 587 (without SSL):
Once the settings are verified, your account will be active and ready to use. To test your new email account, go to Mail and try sending and receiving emails.
et Voila!
